
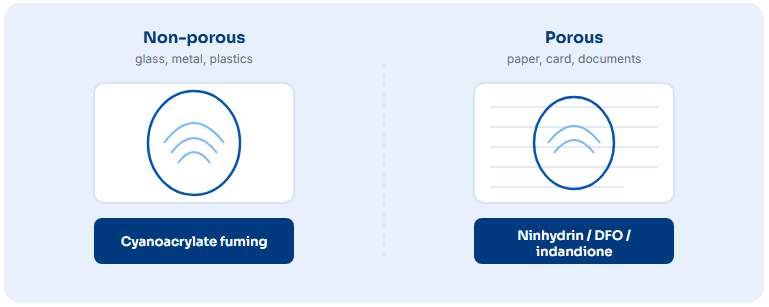
The story of cyanoacrylate fuming has a nice accident at its heart. In the late 1970s, investigators noticed that the vapour given off by superglue left a white residue on fingerprints, revealing ridge detail that had been invisible. What began as an unwanted quirk of the adhesive became one of the most dependable tools in the fingerprint examiner's kit.
Today it is routine, but routine does not mean simple. The quality of the result depends heavily on getting the conditions right, and that is where a purpose-built chamber earns its place.
What is actually happening
A latent fingerprint is mostly water, along with oils, salts and amino acids left behind by the skin. When cyanoacrylate is warmed, it gives off a vapour. That vapour reacts with the moisture and other components of the print and polymerises, forming a hard, white, stable deposit along the ridges. The invisible becomes visible, and importantly, durable enough to photograph and enhance.
Because the technique relies on the print residue sitting on top of a surface, it works best on non-porous items, where the residue has not soaked in. Think glass, metal, gloss plastics, and similar smooth materials.
Superglue fuming works, but it is sensitive. Get the humidity or the contact time wrong and you get weak, patchy or over-developed prints on evidence you may only get one chance with.
Why humidity matters so much
Since the reaction depends on the moisture in the print, the humidity of the air around it is critical. Too dry, and the reaction is sluggish and faint. Too much, or uneven, and you risk over-development, where the deposit grows so heavy that fine ridge detail is lost under a thick white bloom.
This is the single biggest reason a controlled chamber beats an improvised setup. Holding the relative humidity at the right level, steadily, throughout the process is what produces clean, sharp, repeatable prints.
The development cycle, step by step
Humidify
The chamber is brought up to the right humidity before any fuming begins, so the print is properly conditioned.
Vapourise
The cyanoacrylate is warmed and the vapour circulates evenly around the evidence for a set contact time.
Purge
The chamber clears the remaining vapour through a filter before the door is opened, protecting the operator.
Running the same cycle every time is what gives you results you can compare between operators and between cases. It also means the person opening the chamber is not exposed to cyanoacrylate vapour, which is an irritant and best kept contained.
After fuming
The white deposit is often enhanced afterwards, for example with a dye stain that fluoresces under a forensic light source, or with fine powder, to increase contrast for photography. The fuming step is the foundation the rest builds on, so it is worth getting right.
Why the equipment matters for evidence integrity
Two things separate a proper forensic chamber from a homemade box. The first is control, holding humidity, temperature and time consistently. The second is documentation. Being able to show the conditions an exhibit was processed under, tied to a case and an operator, supports the integrity of the evidence if the process is ever questioned.
The CA-PRO cyanoacrylate fuming chamber
Automated, monitored humidity, temperature, contact time and purge, with the whole cycle recorded against the case.